Tuesday, April 26, 2022

playground fun | TMS 654

 Hi y'all! I feel like I blinked and April passed me by! 

It's Tuesday, which means it's time for a new Tuesday Morning Sketches sketch. This is sketch #654:


Oddly enough, this one stumped me a bit. In retrospect, I have a couple of ideas that I could have used that would have been a little more true to the sketch, but at the end of the day, I like how this one turned out, and hopefully my layouts reads true enough to the sketch. 


I cut the cut file with my Silhoutte and then removed the negative space and placed it back within the paper it was originally cut from. The cut file itself is backed with vellum, which is just a tad larger than the cut file. Only the center areas are adhered to the paper which creates dimension. 


We'd love to see what you come up with using this sketch- be sure to share with us over at the TMS blog!


Tuesday, April 19, 2022

Snow Much Fun | TMS 653

 Hello! Today I'm sharing my layout created for Tuesday Morning Sketches sketch #653.

This weeks sketch:


Thankfully, Spring has decided to make an appearance, but this sketch inspired me to create a layout about Winter. 


In addition to the sketch inspiration, this was also created for a monthly crop cut file challenge on the Peartree Cutfiles facebook group. This challenge was to incorporate something hidden, which I did- hidden journaling:


Here are a couple of detail images:


I do hope you'll join along with this great sketch over at TMS


Tuesday, April 12, 2022

3 MONTHS - TMS #653

 Hey y'all! It's Tuesday, which means another sketch up on Tuesday Morning Sketches!

Here's this week's fun sketch:


And my layout:


I wanted to play off the curvy end, so I decided to cut a large "3" using my Silhouette, which was perfect for scrapping these photos of our grandsons 3-month photo shoot. 
This is a pretty simple page, but I added some hand stitching around the "3" and placed most of  the embellishments on top of it. It's raised with some foam to add dimention. 
Some doodling around the perimeter of the base and some ink/watercolor splashes finished it off. 


Paper and stickers are Echo Park
epoxy flair is from ScrappinHappyStudio
letters are Citrus Twist (an old kit)
mists are Heidi Swapp and Shimmerz

I'd love to see your take on this weeks sketch! Visit the TMS blog to share your card or layout! 


Tuesday, April 5, 2022

ADORE YOU - TMS #651

 Hello y'all! It's been a hot minute since I've used this blog, however I am going to try to update it a bit more frequently. :)

I've got some fun news- I'm excited to say that I have been asked to be on the design team for Tuesday Morning Sketches, aka TMS! The site is traditionally a card sketch blog, but I'm going to feature layouts based on the sketch and I do hope those of you who create layouts, will come join in! 

I will tell you that once I saw the first sketch design I would be working on, I was immediately inspired and knew exactly what photo and paper collection I would use! It was super helpful that I just happened to have purchased the new Pinkfresh Studio Happy Heart Collection which I felt was perfect for this sketch!

Here is TMS sketch #651


Here's my take:

I fussy cut the floral wreath feature from one of the patterned papers and added some dimensional foam tape for depth. Matting the photo 3 times helped add some more color and detail. I machine stitched around the edges and then folded them up for a distressed look. The title uses some Bramble Fox Perspextives. I added some yellow and pink mists. Finishing off with some fussy cut butterflies completed this and created some extra delicacy. 


Head on over to the TMS blog to see all the beautiful cards from the team as well as enter your project! I hope to see you there! 


Saturday, October 17, 2020

Halloween Treat Containers | CutCardStock Blog Hop

Hello y'all! Welcome to the next stop of the CutCardStock Happy Halloween Blog Hop! You are at Raechelle's blog. :)

Today I'm sharing some super cute and easy to make treat boxes that I created using my Silhouette (all designs are from the Silhouette Design Store). 


Here's a quick tutorial:

Cut selected 3D boxes using your electronic cutting machine. 


Assemble boxes by folding along perforated edges and adding adhesive where needed. 

For  Ghosts add two black eyes using item of choice. I used Nuvo Drops and allowed to dry overnight. 


For pumpkins cut a piece of yellow cardstock to create a glowing effect. Add stem, leaf, and twine. 


My aplogies for the lack of anything for the bat pillow boxes as I somehow overlooked them as I was assembling. 

Once assembled they will look like this:


I used the following cardstocks to create these:


When complete, just fill with treats! These are pefect for co-workers, parties, even trick-or-treaters. 

Thanks for stopping by today! I hope my project has inspired you to create something fun! 

Your next step along the hop is: 


Don't forget: to be eligible for the $40 gift card, you must comment at each stop along the hop OR upload a project that includes product from CutCardStock.


Sunday, January 19, 2020

family {CUT to YOU}


savingPNG


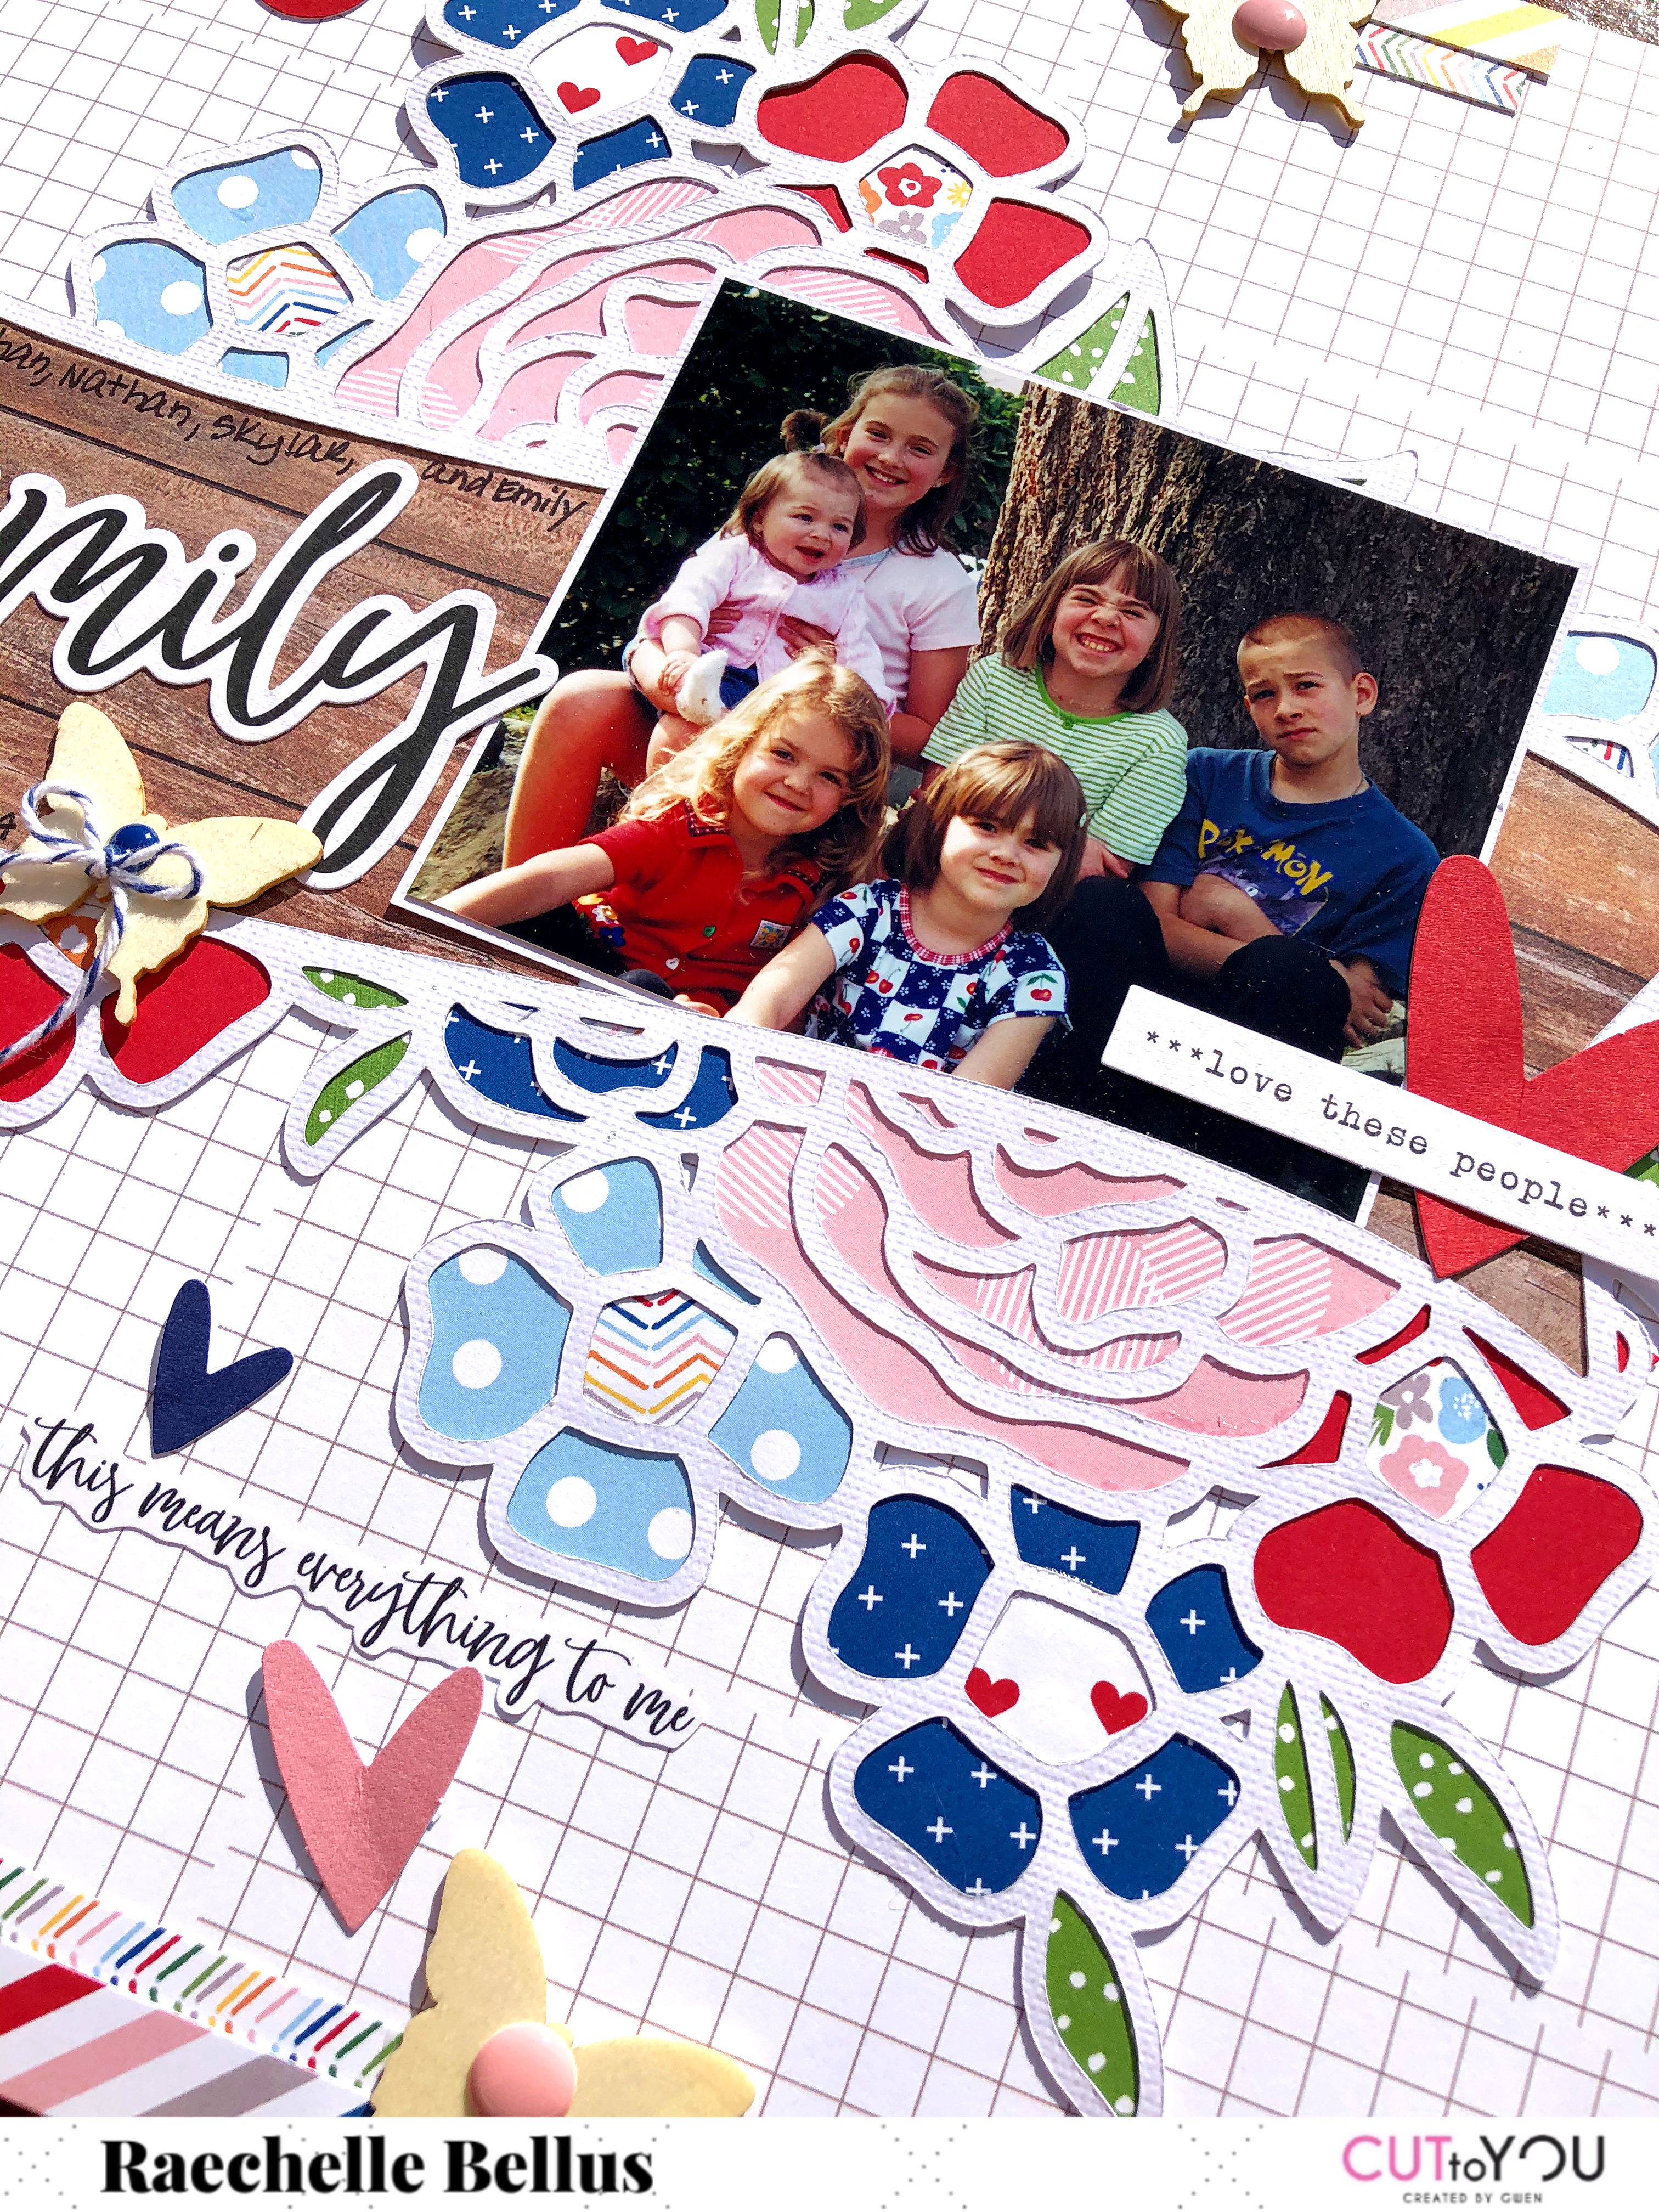
Hello all! Raechelle here sharing a decades-old photo featuring the gorgeous new Floral Banner 2 cut file.
I was scrolling through some old photos and came across this gem of our children taken 20 years ago. I must say that I didn't pay much attention to the date until it came time to document it, and I honestly had to do a triple take. No way could this photo have been taken twenty years ago. There is just no way these children are two decades older, but they really are. Just wow. 

XFloralBanner2

Enough on that. Since there are so many colors in the photo, I wanted to empahsize them, but also keep this page light and fresh. Starting with a lighter color to back the larger two florals was a perfect way to keep the focus on the photos. Adding in the pops of color keeps the eye moving around the entire cut file, yet still maintaining a light feel. 

Attachment-1 - Copy (2)

A few die cuts, strips of patterned paper, and whimsical wooden butterflies tie everything together and creates movement. Tucking the photo into the beautiful cut file makes this page feel cohesive and as if the photo is blooming out of the banner. 

Attachment-1 - Copy

There are so many fun and whimscial cut files to choose from in the CTY store. Which is your current favorite? Be sure to share your proejcts with us on the CUT to YOU HQ facebook page. We'd love to see them!

DT_NEW_Raechelle_B

Friday, January 3, 2020

SNOW- Cut to You

Hello! I hope your New Year is getting off to a grand start.
I am so excited to be sharing my first layout as a returning member of the CTY design team! I am thrilled to be back and look forward to sharing inspiration with as well as being inspired by all of you.

Attachment-1[6763]

My first thought upon seeing the Bo Ho Circles cut file went immediately to snowballs, so I created this fun snow page featuring my granddaughter, Aubree, who I was fortunate to have visited in the Chicago area last January. 
 79864643_10221091472815331_1872738820617666560_o

I wanted to add a little extra to the circles with the photos of my granddaughter, so I lightly traced inside the circles where the photos would be placed and used a couple of spray inks to paint around them. I also finished off with  few splatters to add a wee bit more pop.


Attachment-1


Completing the layout were a few fussy cut snow creatures and die cuts, along with a few sequins. 


Attachment-1[6761]

I am looking forward to seeing how you interperet this fun and versatile cut file! You can get this one along with so many more by visiting the CTY shop
Be sure to share your creations on our facebook group, too! 


DT_NEW_Raechelle_B